How to Convert OST to PST by Follow These easy steps

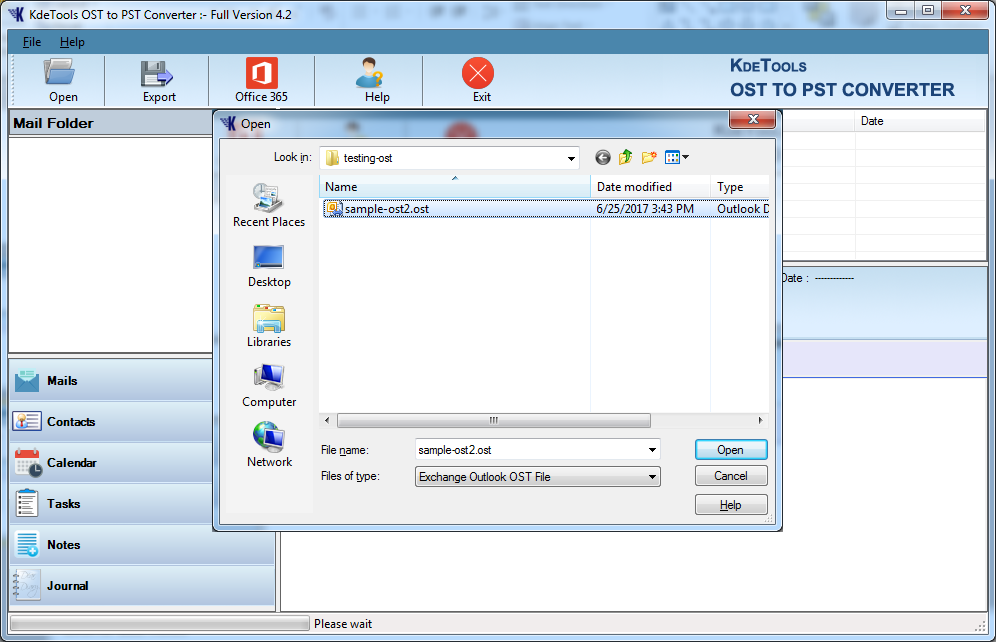
Step 1 Download and Run OST to PST converter software, then click on 'Browse Button' to load OST file.
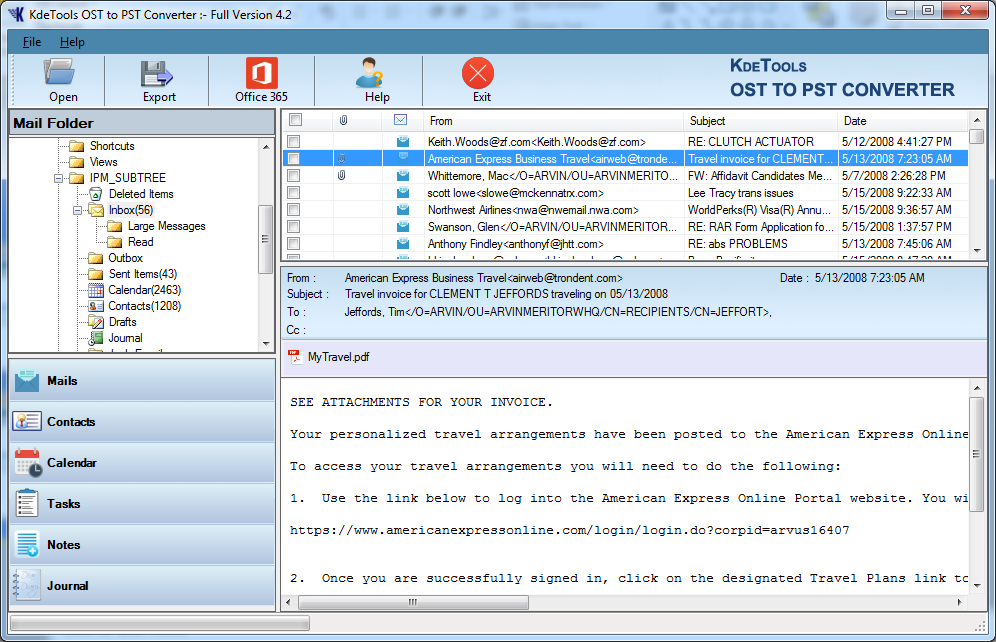
Step 2 After load OST file, you can check OST file 'Preview' on the right side of the software.
Step 3 Then click on 'Export button' to choose required saving option.

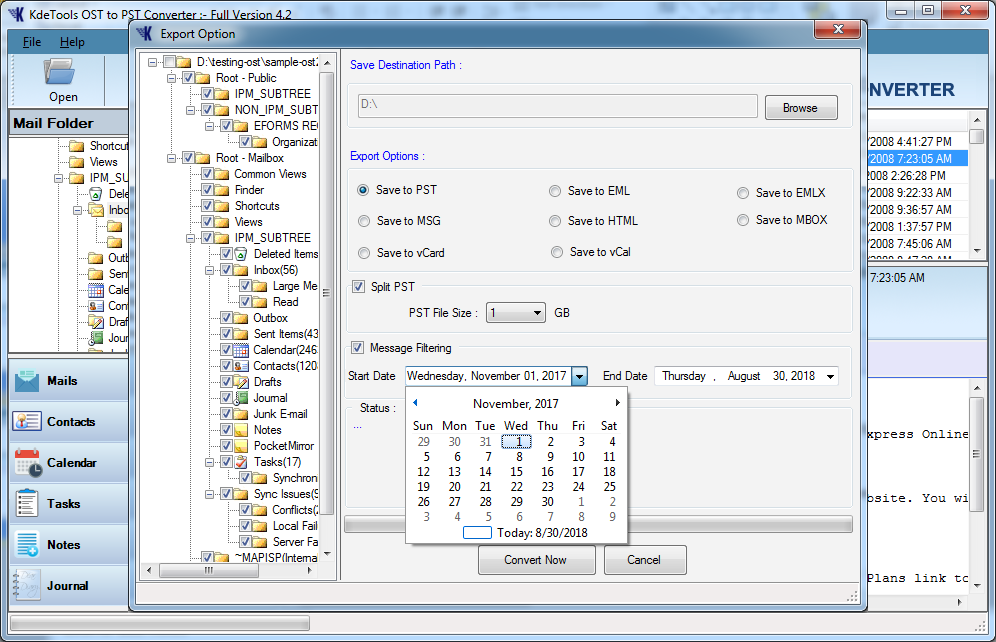
Step 4 After selecting saving option, you can choose 'Split option' to split the PST file by size.
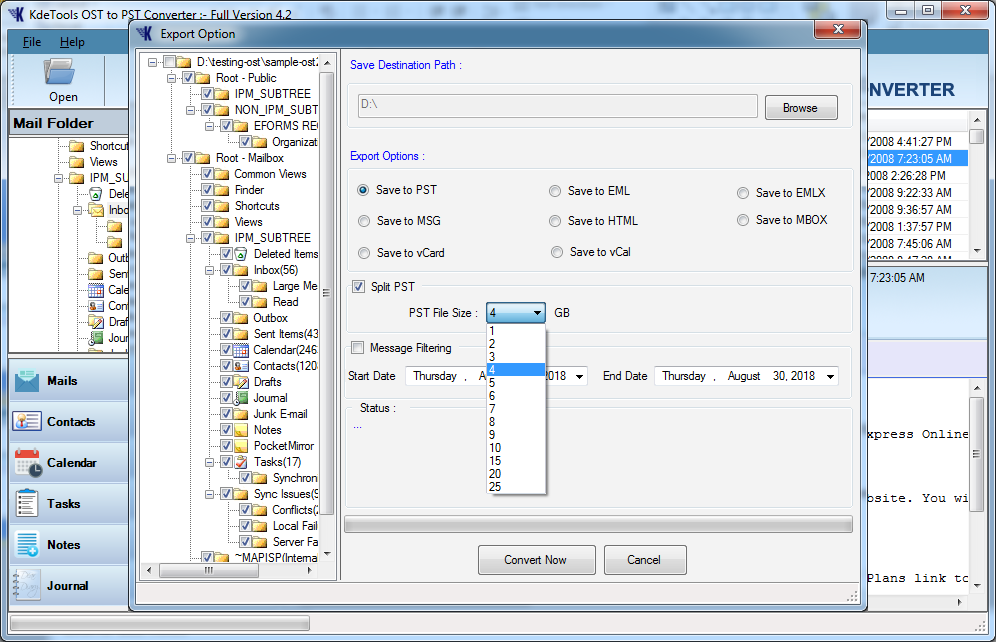
Step 5 Select 'Message Filtering option' to split the PST file by date. As shown in the screenshot.
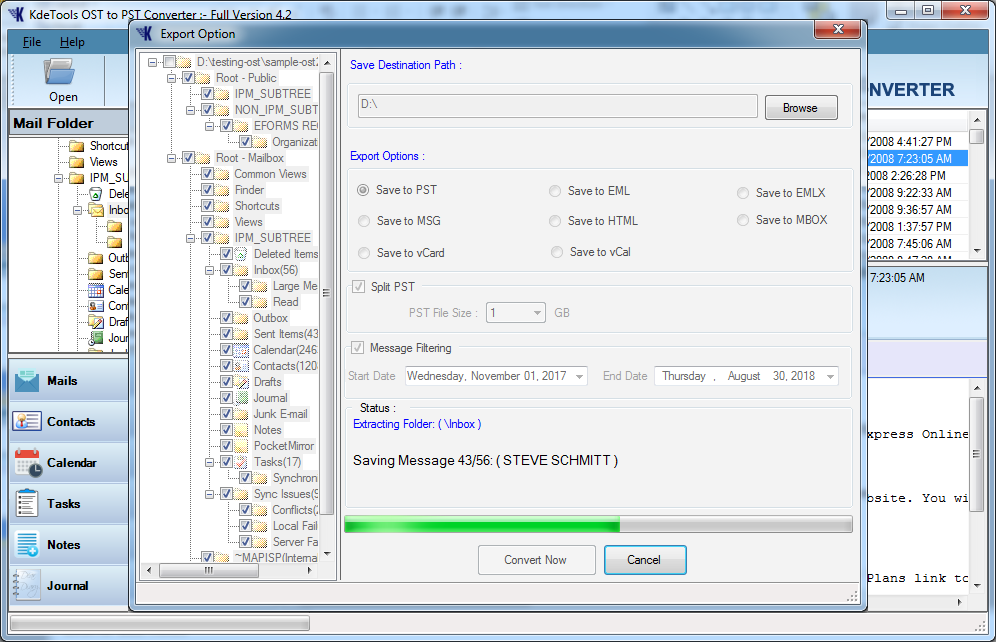
Step 6 Click on 'Convert Now' button to start conversion of OST to PST file.
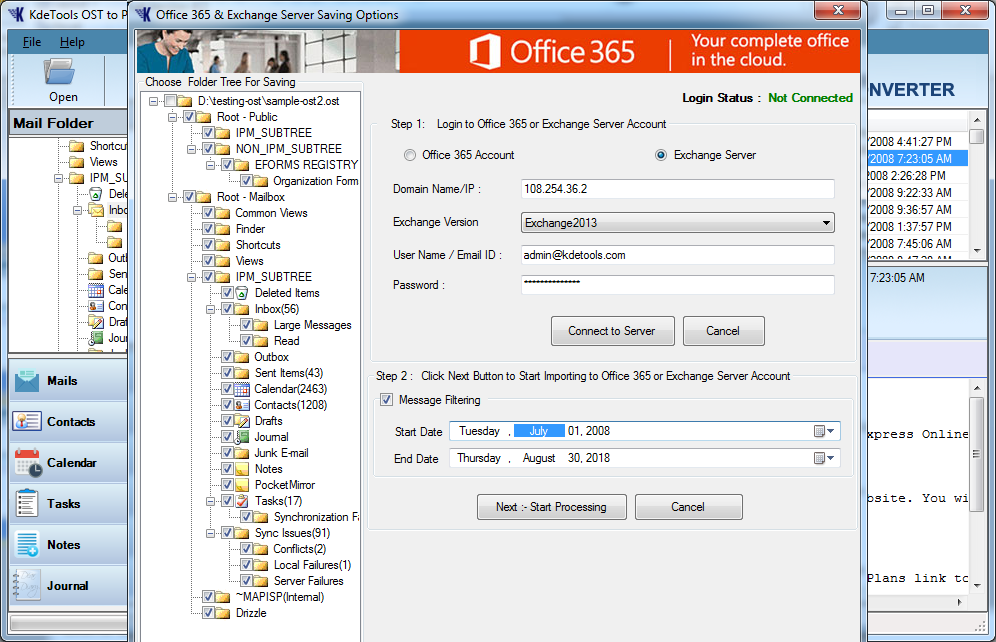
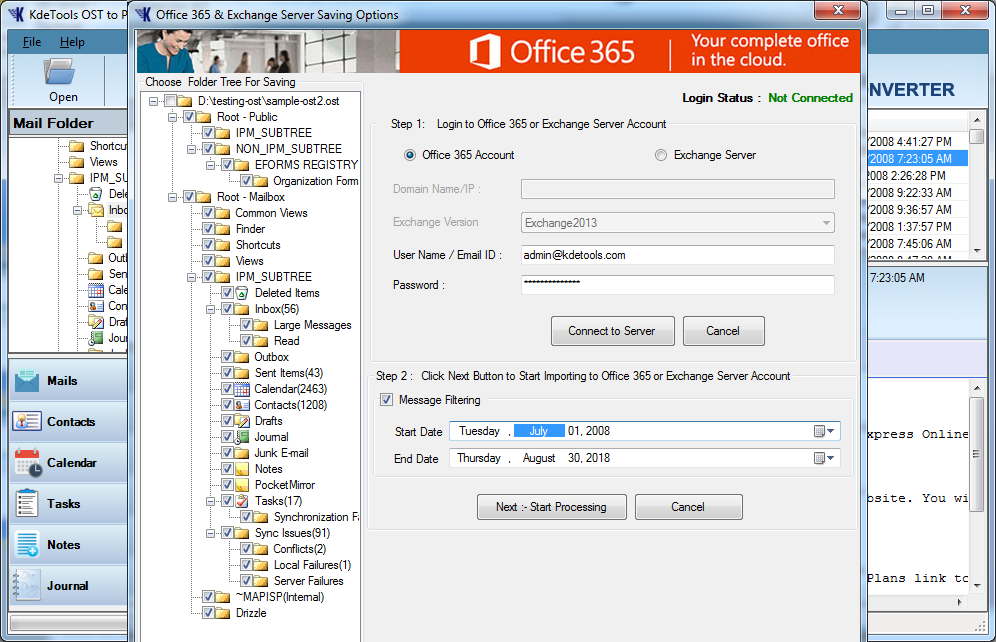
Step 7 Click on 'Office 365' button to directly import OST file to Office365.

Step 8 Enter required information to connect and Click on 'Connect to Server' button.
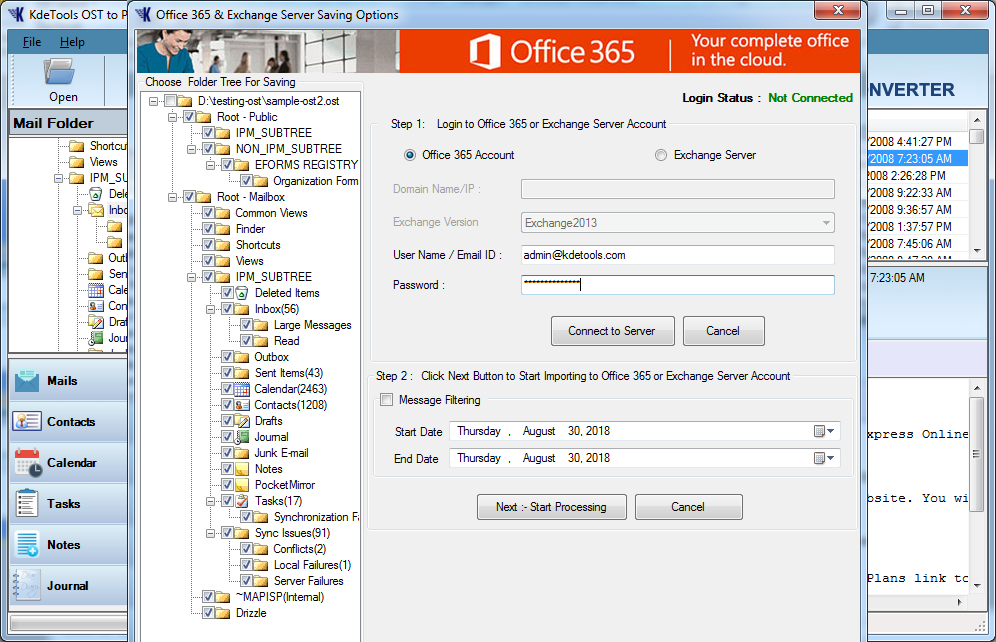
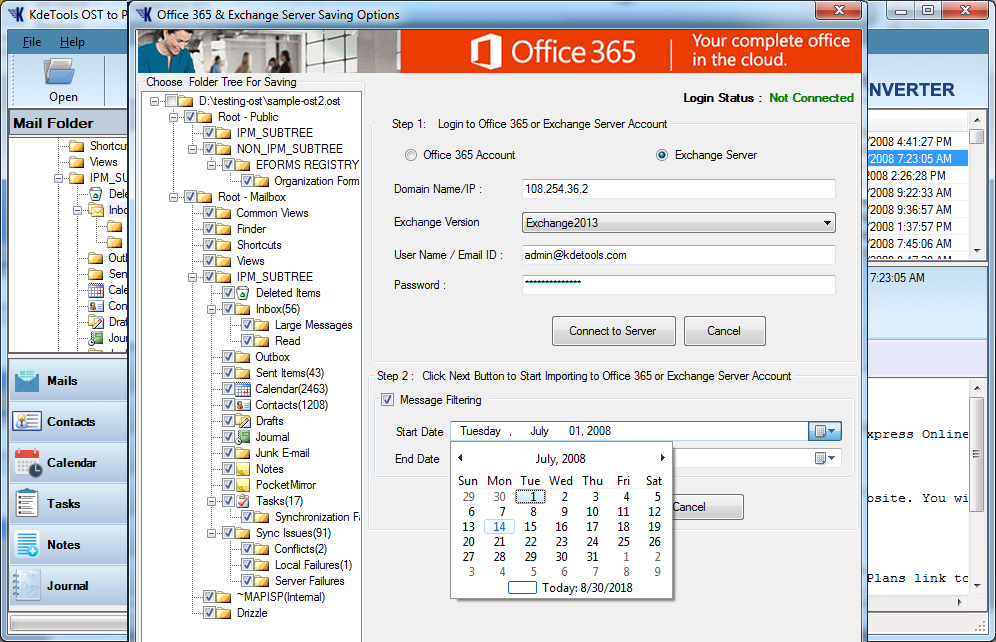
Step 9 You can also filter message by particular date range.
Step 10 After selecting option Click on 'Start Processing' button to import OST file to Office 365 account.
Step 11 Click on Office 365 button. Then, Select button 'Live Exchange Server' and enter the required information to connect.
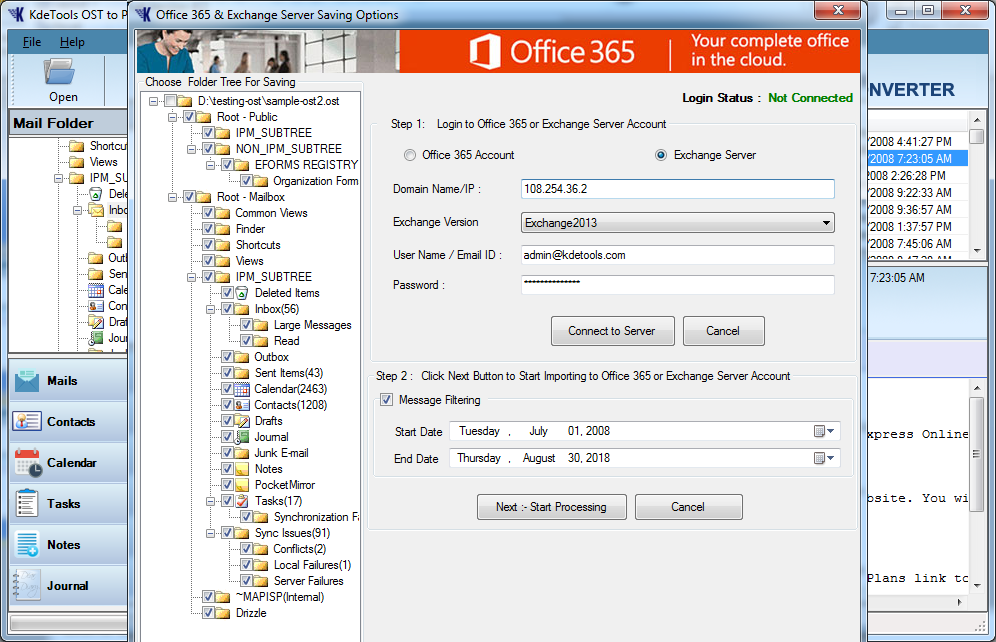
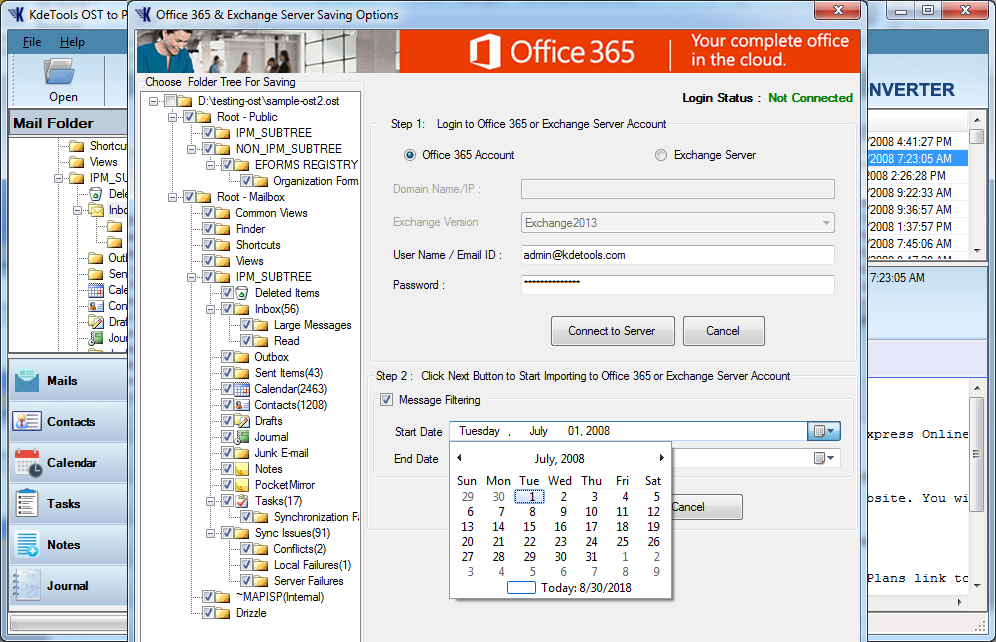
Step 12 You can also filter message by particular date range.
Step 13 In this step, Click on 'Start Processing' button to import OST file to Live Exchange server account.